Microsoft’s free executable file can help you install Windows 11 on any eligible PC from a USB drive or DVD.
If you need to install on a new computer and don’t have a USB or computer available to create a Windows installation USB, you can buy it on Ebay for a very cheap price, you can refer to it here: Ebay
Looking to upgrade to Windows 11 on your current computer or install it fresh on a different PC? You can now install Microsoft’s Windows 11 Media Creation Tool to create an installation file that can be copied to a bootable USB drive or burned onto a DVD.
Microsoft is gradually rolling out Windows 11 to compatible Windows 10 machines, but that means it could be weeks or even months before the update reaches you. If you’re in no rush to install the new OS, you can wait for it to be available on your PC. But if you wish to upgrade right away, the Media Creation Tool is your best bet. Here’s how it works.
Check Compatibility
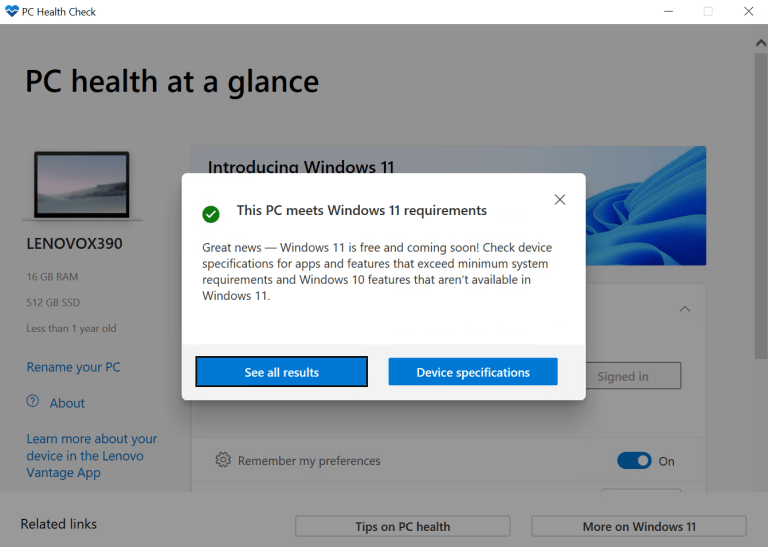
To install Windows 11, your computer must meet the new operating system’s minimum requirements. Not sure if yours is compatible? Download and run Microsoft’s PC Health Check Tool to find out.
Go to the Windows 11 Specifications page(Opens in a new window) and scroll to the bottom until you see the Check for compatibility section. Click the Download PC Health Check App link to install the program. Open the app and click the Check now button. A message will tell you whether or not your PC meets the requirements.
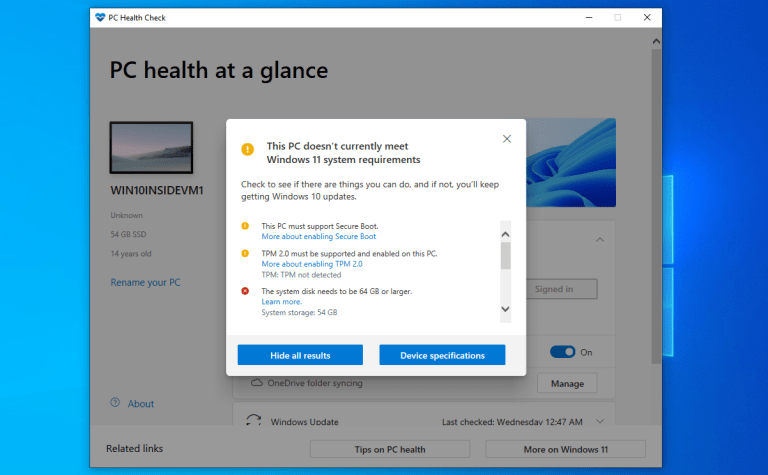
If your PC doesn’t make the grade, the app will explain why it doesn’t currently meet the system requirements, with the specific issues listed out for you.
Download the Media Creation Tool
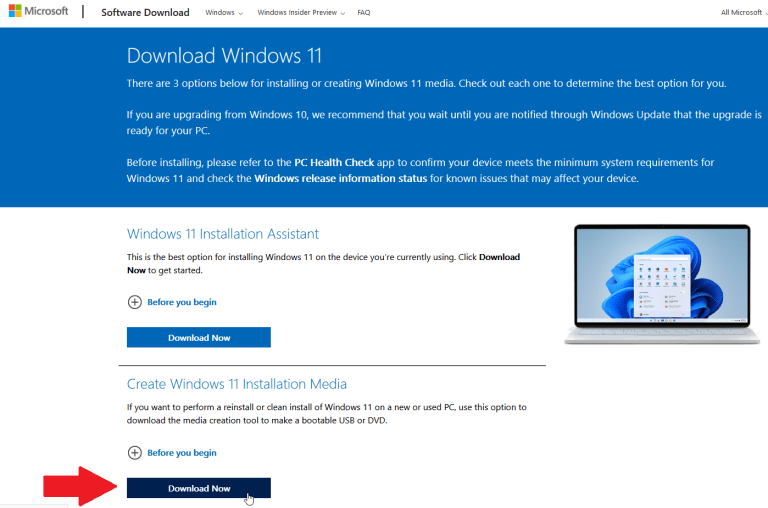
If you’re in the clear, open Microsoft’s Download Windows 11 page(Opens in a new window) on any compatible computer (it doesn’t need to be the PC on which you will install Windows 11).
You are then given three choices for installing the operating system. You can use the Installation Assistant, installation media, or a disk image (ISO file). Scroll down to the Create Windows 11 Installation Media section and click Download Now.
Choose Media Type
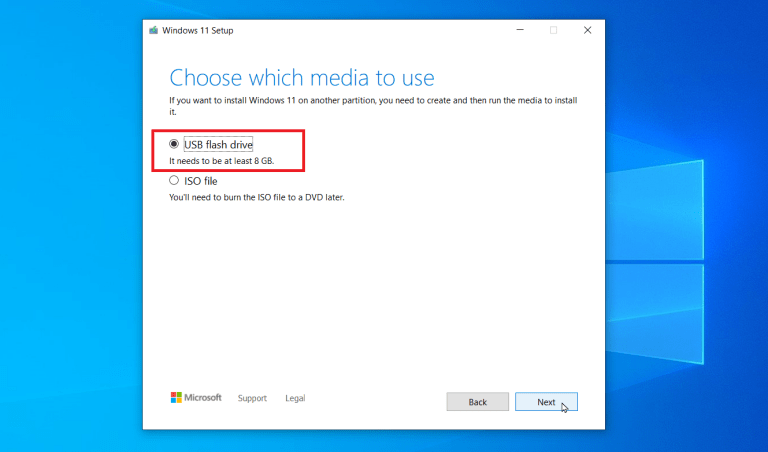
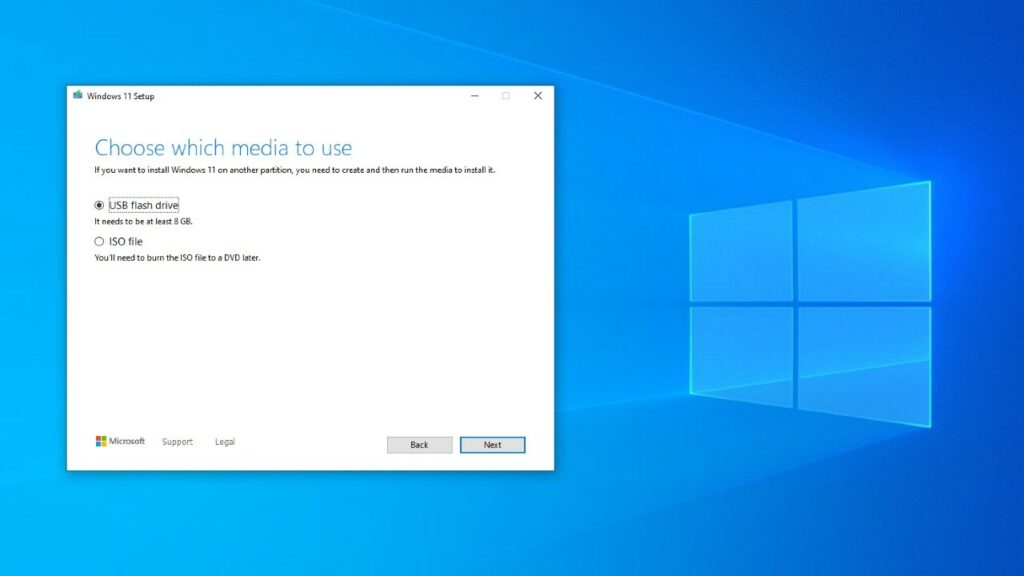
During the setup process, you’ll be asked to accept the license terms and then confirm the language and edition for Windows 11. You are then asked which type of media you want to use: a USB drive with at least 8GB of space or an ISO file that you can then burn to a DVD. If you opt for a USB drive, make sure the drive is connected to your computer. Click Next.
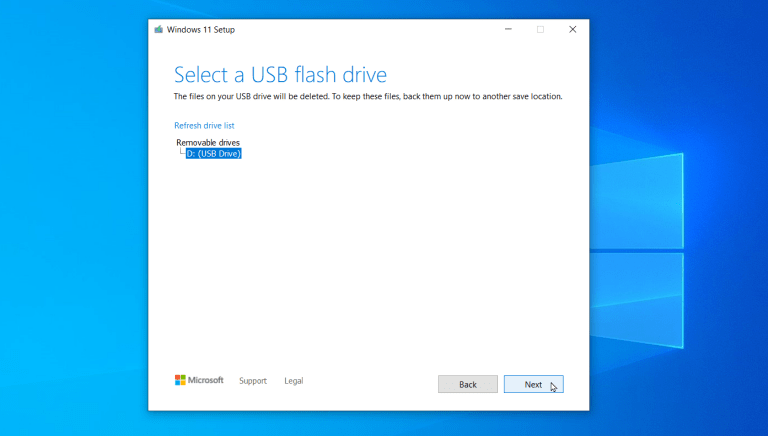
Make sure the correct USB drive is selected, especially if more than one removable drive is connected to your computer. Click Next. The tool downloads Windows 11 onto your USB drive and then creates the installation media. When the process is complete, click Finish.
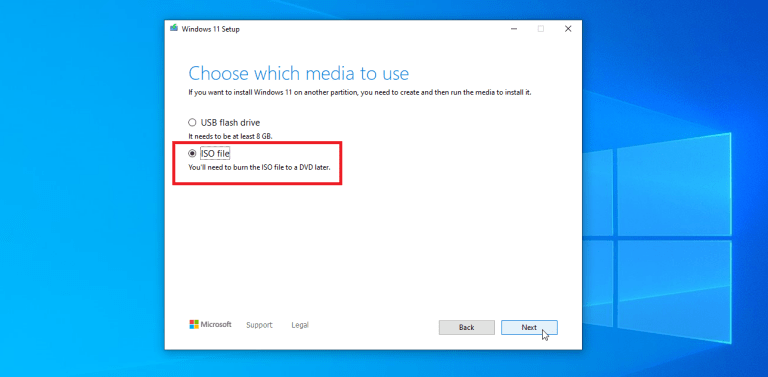
Want to go the DVD route instead?
At the screen to choose which media to use, select the ISO file option and click Next. Choose the folder you want the file downloaded to and change the name of the file to something more specific, such as Windows 11.iso. Click Save and wait for the file to be downloaded to the selected folder.
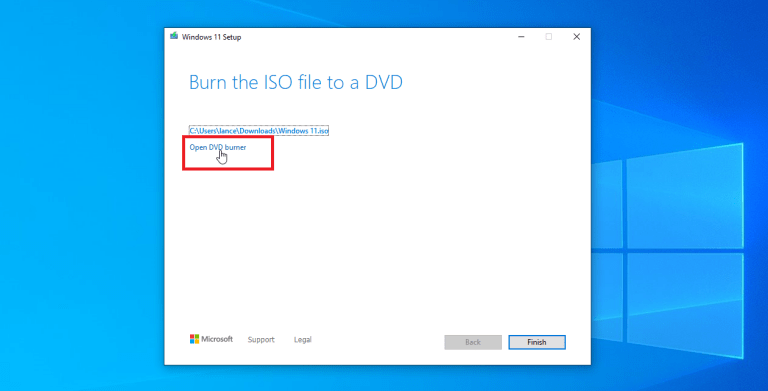
After the process finishes, the program asks if you want to burn the ISO file onto a DVD. You can burn the file now if you click the Open DVD burner link. You can also wait to do this another time; just make note of the file location so you know where to find it later.
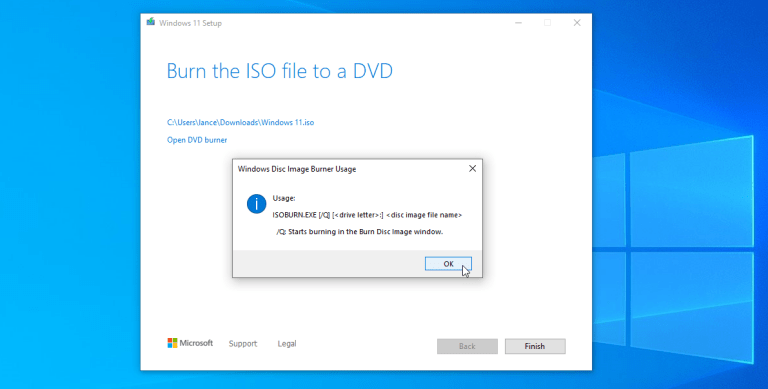
Rather than opening the built-in Disc Image Burner tool, Microsoft only shows you a dialog box displaying the name of the executable file and parameters to use the tool from a command prompt. Click OK to close the message, then click Finish to close the Media Creation Tool.
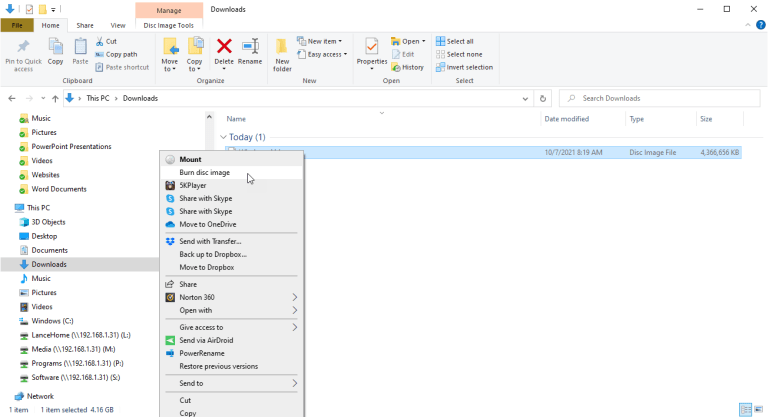
You can certainly use the command line version of the Image Burner tool, but there’s an easier way. Place a recordable DVD in your PC’s disc tray. Open File Explorer and right-click on the Windows ISO file, then select the Burn disc image command.
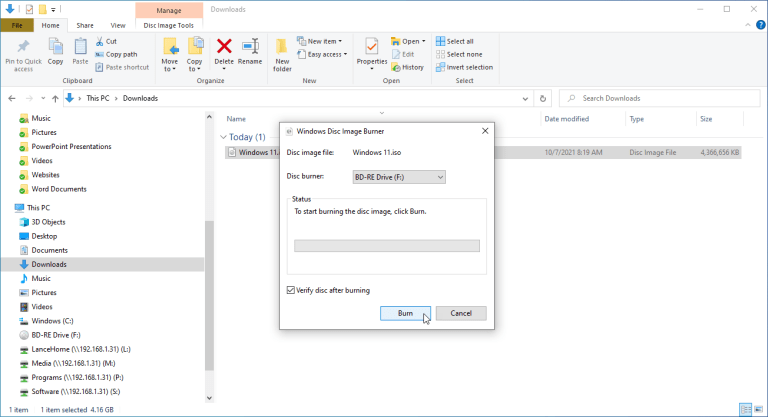
Choose the correct DVD drive if you have more than one. Check the box next to Verify disc after burning if you wish to make sure the burning was done correctly. Click the Burn button. After the process is finished, close the Disc Image Burn tool.
Update to Windows 11 from Windows 10
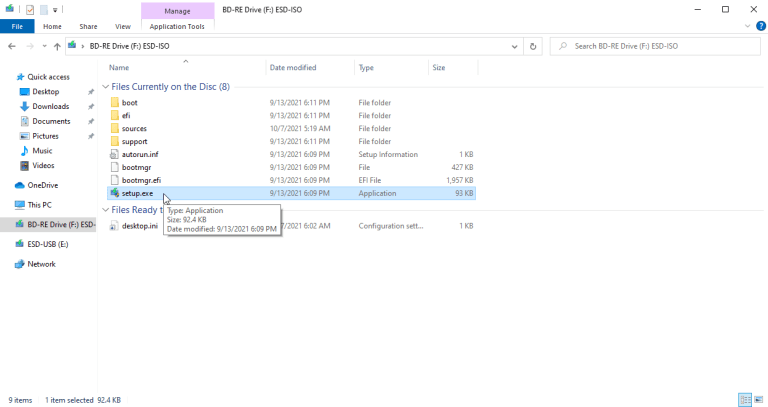
Now it’s time to install Windows 11. First, let’s say you want to upgrade to the new OS from Windows 10 on one of your computers. Sign into Windows 10 on that PC and insert the USB drive or DVD into the computer. Browse to the files on the USB drive or DVD and double-click the setup.exe file.
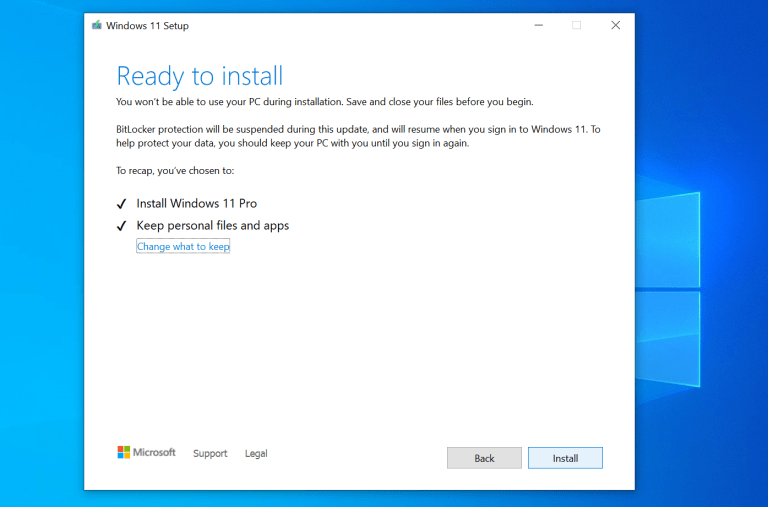
Microsoft informs you what files and settings will be kept, and recaps what is about to be installed. Click Next, accept the license terms, then click Install. Windows 11 runs the upgrade and then reboots. Sign in, and Windows 11 should be up and running.
Install Windows 11 From Scratch
Alternatively, you may want to install Windows 11 fresh. In this case, you could use a computer that has no operating system or one that has an OS you want to simply wipe out. Insert the USB drive or DVD into the computer and power it up. Press the appropriate key for your computer to access the boot menu. Select the USB drive or DVD.
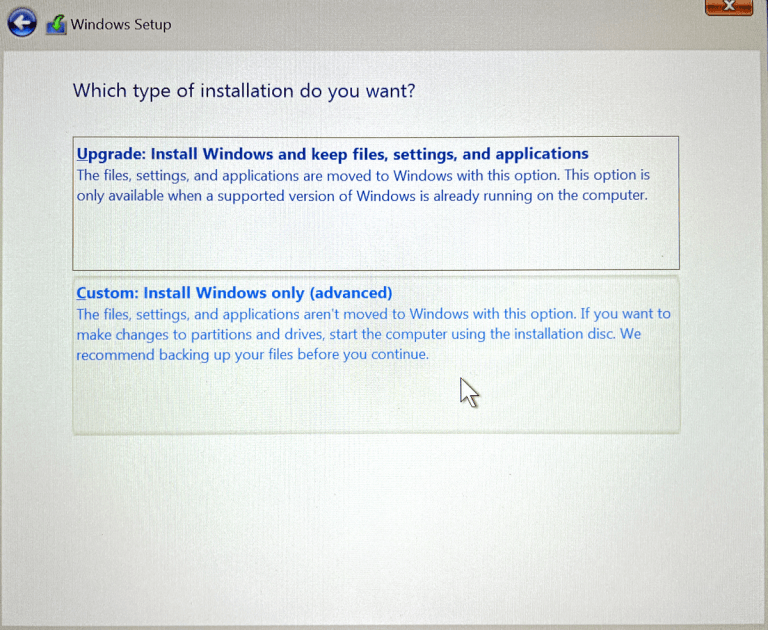
The Windows 11 installation and setup should automatically start. The first screen confirms your language, time, and keyboard. Click Next, then Install Now. Enter a product key or bypass that screen if you don’t have one right now. Choose your version of Windows 11 and then select Custom: Install Windows only (advanced) as the type of installation you want.
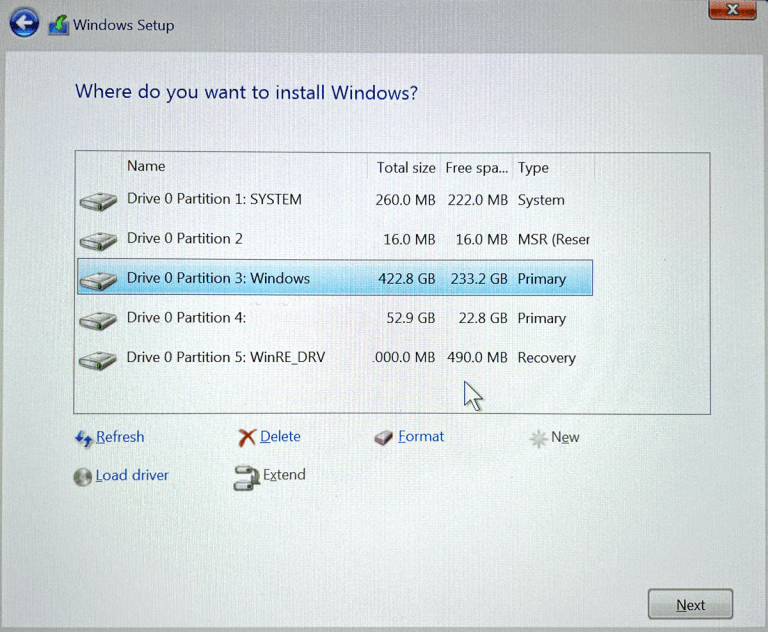
At the next screen asking where you want to install Windows, choose the primary partition, which should be empty if no OS exists. Otherwise, choose the Windows partition if you want to wipe out your current version of Windows with Windows 11, then click Next.
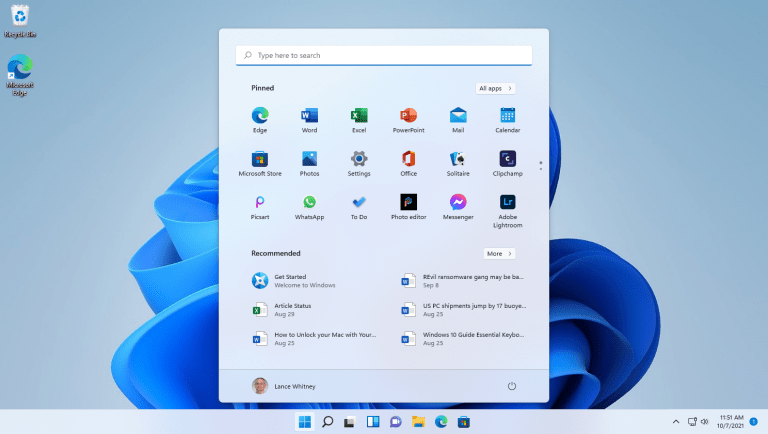
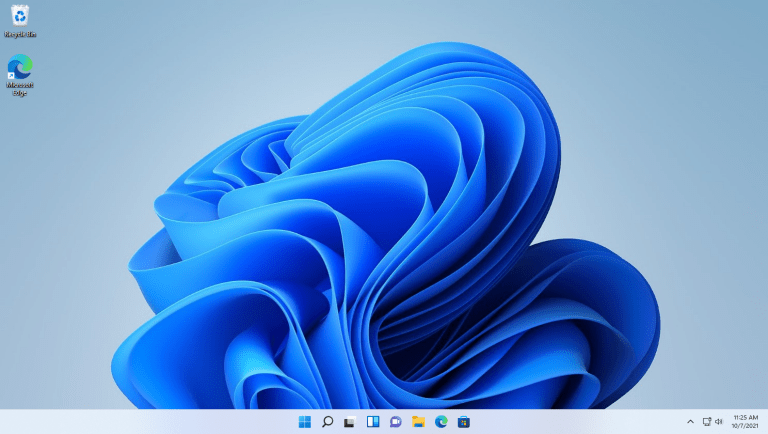
Windows 11 will then be installed. After the installation, follow the steps to set up the new OS. You then should be deposited in your new Windows 11 environment.
Source: pcmag.com


