Installing an operating system on a new PC can be daunting, however, with the right guidance, it is straightforward and quite easy. In this article, we will walk through each step to install Windows 11 on a new PC without any operating system, from preparing the installation media to configuring the system settings.
How to install Windows 11 on New PC without Operating System?
To install Windows 11 on a new PC without an Operating System, follow the steps mentioned below:
- Change Priority Boot
- Download the Windows 11 Media Creation Tool
- Install Windows 11
- Set up a user account and password
Let’s see each step in detail.
1] Change Boot Order
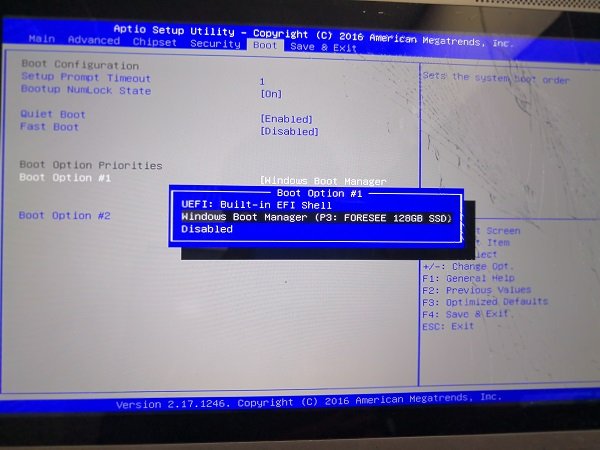
First, we are going to change the boot order as without doing so, the computer will boot from an empty hard drive or another source. So this step ensures that the computer boots from the installation media, in our case the USB drive.
- Click the F10, F2, F12, F1, or DEL keys simultaneously, after powering the computer to launch the BIOS menu.
- Now, navigate and click on the Boot tab.
- Select Removable Drive or USB in the Boot Option Priorities, and hit the Enter key.
So, now when your computer starts, it will take the attached USB drive as the default boot option. Do keep in mind that these options depend on your OEM, so, you might have to look for synonyms.
2] Download the Windows 11 Installation Assistant
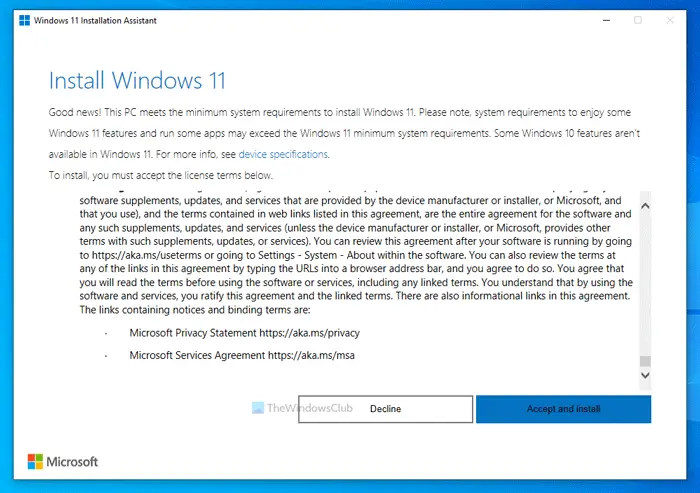
The next step includes downloading the Windows 11 Installation Assistant, and we are doing so because it simplifies the process of creating bootable Installation media. This bootable media is necessary to install Windows 11 on a system that doesn’t already have an operating system, as it contains all the files required to start the installation process. For that, make sure that you have an 8 GB USB flash Driver. Once ensured, let’s see how to download the Windows 11 Installation Assistant.
- To download the tool required to install the OS, launch the browser, and then go to the microsoft.com.
- Navigate to the Windows 11 Installation Assistant section, and select the Download Now option from there.
- Run the downloaded file and accept the license terms and conditions to launch the Media Creation Tool app. If you want to change the Windows language, untick the Use recommended box, followed by the Next button.
- Users will be presented with two options: Create a bootable USB drive or ISO file to use the ISO later. As mentioned earlier, we are going to select the former, so insert the USB driver, hit the first option, and select the Next option.
- Now, select the USB drive, and then again select the Next button.
This will prompt the app to start downloading. Once it’s downloaded, verify the download, and your Windows 11 bootable media is all set to install Windows 11 on the PC.
If you have a Windows 11 ISO file, you can create a bootable drive using Rufus.
3] Install Windows 11

Now, let’s install Windows 11, and for that, follow these steps.
- First and foremost, reboot the PC with the prepared bootable USB flash drive, and then select the Install Now button.
- Follow the instructions displayed on the screen to begin the installation, and then click the I don’t have a product key or skip it if you have entered it during the installation.
- Click on I accept the terms and conditions, then the Next button, and follow it by clicking on the Custom Installation option.
- Select the Region and the keyboard layout. Once done, users will receive the Oops you’ve lost Internet connection screen, here click the Shift + F10 button to open the Command Prompt Window.
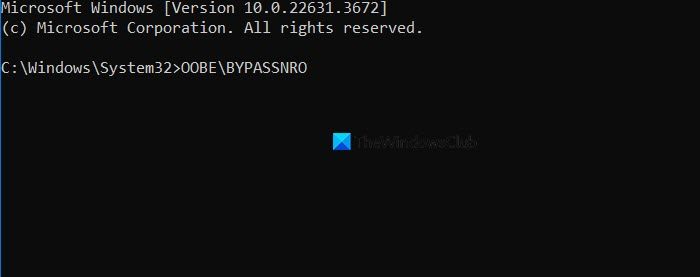
- Type in the following command and hit the Enter button:OOBE\BYPASSNRO
- The device will automatically start itself and will show the Let’s connect you to a network screen. In this Window, click on the I don’t have Internet button, or if you have, select the Next button, and plug in the Ethernet cable.
- Select the Continue with limited setup button, and exceed with the setup process.
- Now, click on the Primary drive, and lastly, select the Next button.
Complete the process by following the on-screen instructions, and we have installed Windows 11 on our device.
4] Set up a user account and password
After the installation, let’s set up a user account and password.
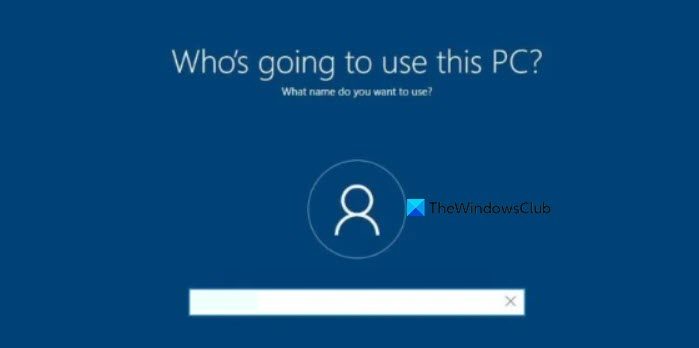
- Once the installation process is done, users will be directed to the setup screen to create a user account and fill in all the details.
- Add the user’s name in the Who’s going to use this PC page, enter the security question, and then follow the onscreen instructions to complete the process.
- After logging in, users can create a new user account or edit the one with which they logged in.
- Now, head to the start bar, click on Settings, and go to the Accounts section.
- There, click on the Family and Other users option, select the account for administrator part, and then select Change Account type.
- Change the Account type to Administrator and then hit the OK button to apply these changes.
That’s it! Enjoy your new operating system.
Can I install Windows 11 without system requirements?
Yes, and it’s quite easy to install Windows 11 without system requirements. Users can do it using Rufus and to know more about it, check our post to bypass TPM and Secure Boot during Windows 11 Installation which are the main requirements of Windows 11.
How to Install Windows 11 step by step?
Installing an operating might seem like a daunting task, but it’s not actually. We recommend you check our guide to installing Windows 11 on your computer. However, make sure that you meet the minimum system requirements issued by Microsoft.