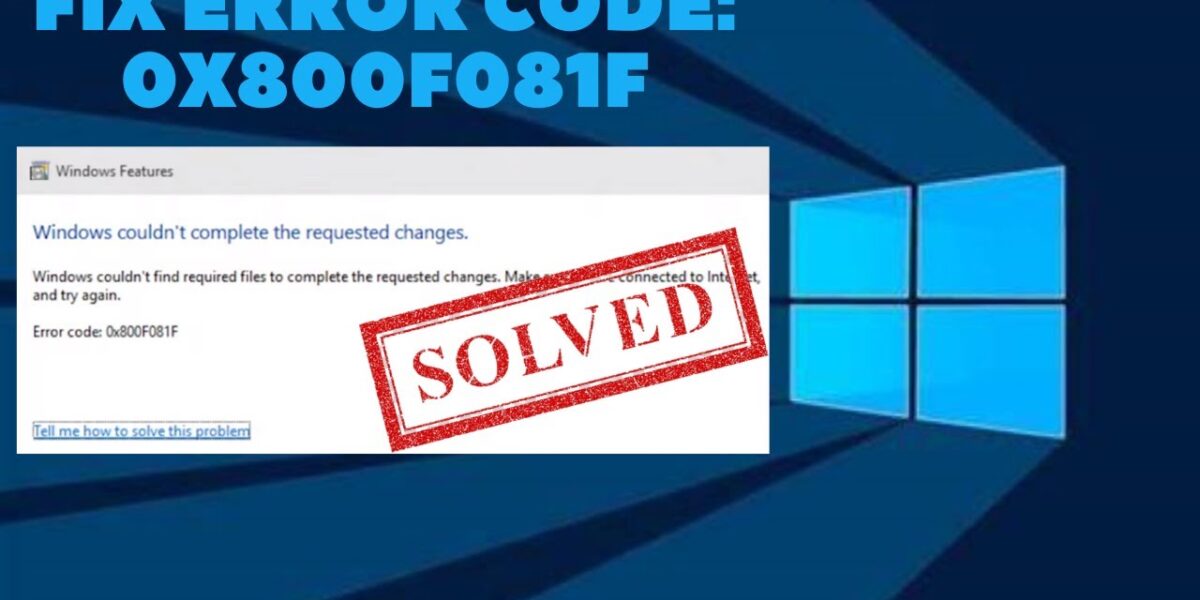
The install error 0x800F081F in Windows 11 is a critical system error that is generally caused by malfunctioning .NET framework.
Windows 11 has come a long way since its debut back in 2021. Numerous updates and fixes later, however, the OS is still riddled with bugs that are coming to light every day. One such bug is the install error – 0x800F081F, which pops up while installing an OS update. The reasons behind this are many like corrupted system files, issues with the .NET framework, and more. Let’s read further and see what this issue is.
What is the 0x800F081F Install Error?
The 0x800F081F install error code is a common system error that first came into light when Windows 11 users were unable to install the Windows 11 (KB5016632) 2022-08 cumulative update.
Users encountering this error speculated that this error code originated due to unresolved bugs in the update. This error is generated due to issues with the .NET Framework or corrupt registry keys or system files. It has also affected many users running Windows 10 and Windows Server 2016. Here are some reasons that could cause your Windows 11/10 PC to show the 0x800F081F error code –
- Using the insider build
- Compatibility issues .NET Framework
- Damaged or missing registry keys
- Corrupt system files
- Buggy update
- Improperly installed OS update
- Corrupted user profile
Methods to Fix the Install Error 0x800F081F on Windows 11
Let’s look at some ways to get rid of the install error – 0x800F081F on your Windows 11 PC.
Method 1: Run Windows Update Troubleshooter
Sometimes, the updates that you are trying to install could be buggy or there could be an issue with the update wizard. In such a case, you can encounter the 0x800F081F error code on your computer screen. You can easily fix it by running the Update troubleshooter. Here are the steps to do so –
- Press WINDOWS + I to open Settings.
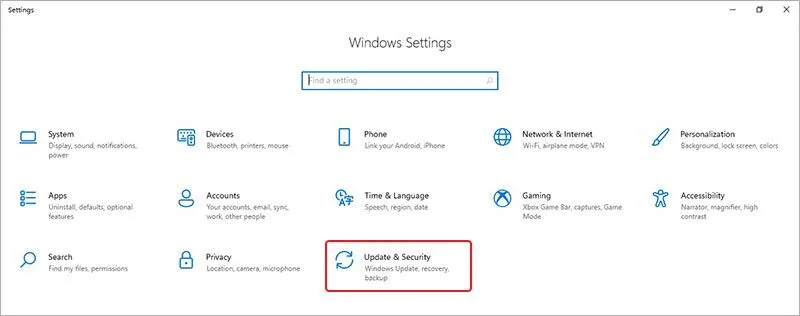
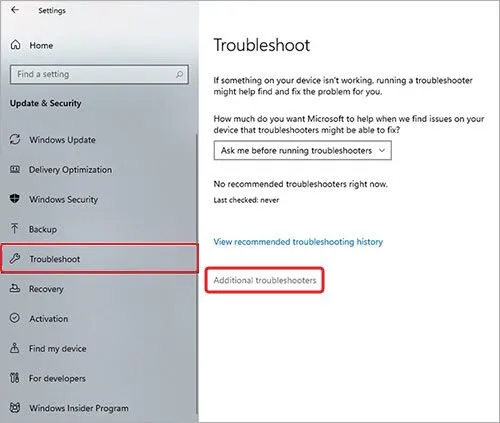
- Click on Update & Security and then click on Troubleshoot in the left pane.
- Click on Additional troubleshooters.
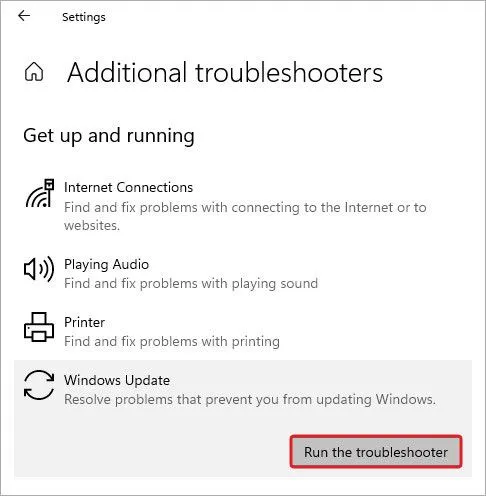
- Look for Windows Update in the list and click on it.
- Click on Run the troubleshooter and wait for it to finish the process.
- Follow the instructions as prompted by the wizard.
Method 2: Edit Group Policy
This is another solution to fix the 0x800F081F error on your Windows 11 PC. Here, you can adjust the group policy settings that allow you to set up a Windows update configuration for the installation of optional components. Here’s what to do in this method –
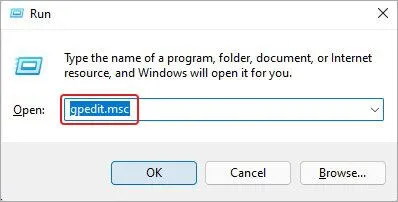
- Press WINDOWS + R to launch RUN, type gpedit.msc and hit Enter.
- Expand the following in the left pane – Computer Configuration > Administrative Templates > System.
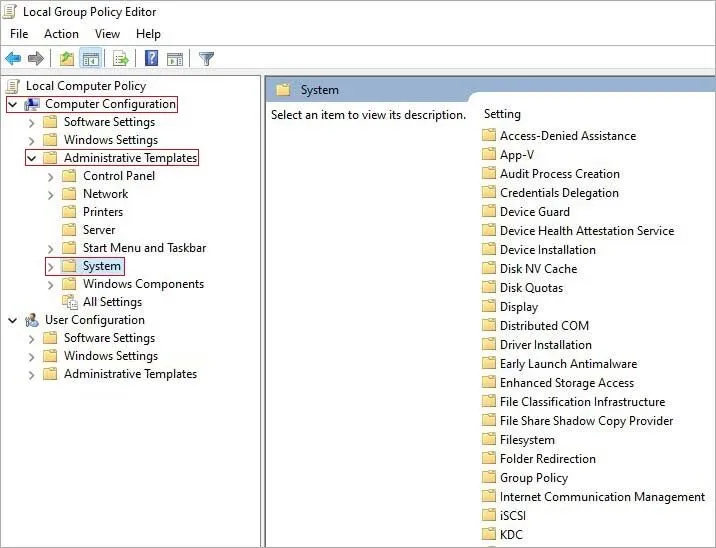
- Locate the Specific settings for optional component installation and component repair entry on the right-hand side pane.
- Right-click on it and click on Edit.

- Choose the Enabled option and then click on Apply and OK.
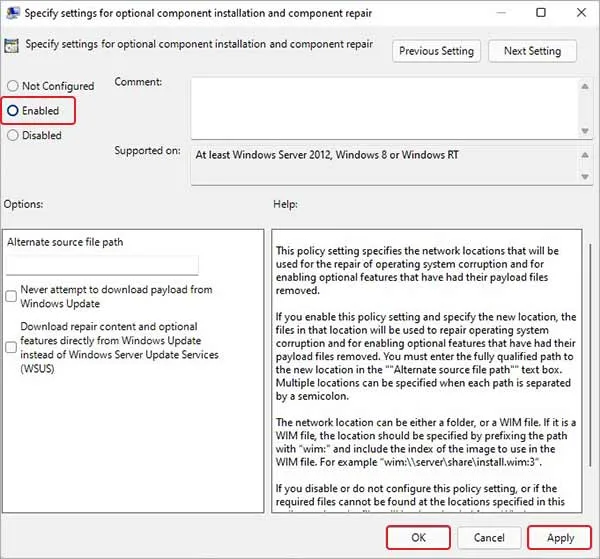
- Restart your computer.
Method 3: Use the DISM Command to Service Windows 11 OS Image
You can use the DISM or Deployment Image Servicing and Management to service and repair Windows images. You can run this to fix any issue with your Windows image that might be causing the 0x800F081F error to pop up on your Windows computer. To do this –
- Launch CMD with administrative rights.
- Type DISM.exe /Online /Cleanup-image /Restorehealth in the terminal and press Enter.
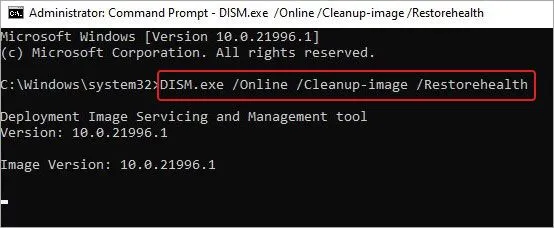
- Wait for it to finish.
- Once it is finished and the “The operation completed successfully.” message appears, close everything and reboot your PC.
Method 4: Perform SFC Scan
SFC or System File Checker is a tool that is used for scanning the system files for any data corruption. This tool replaces corrupted system files using a cached copy available locally on the computer itself. This is pretty easy to use –
- Launch the elevated Command Prompt and type in sfc /scannow.
- Press Enter.
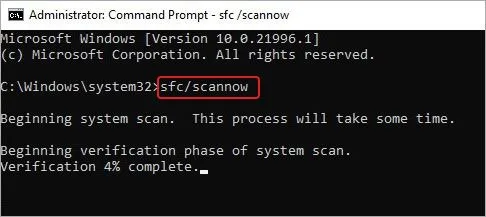
Wait for the scan to complete. Once it is done, restart your computer and see if this has fixed the issue.
Method 5: Remove WUServer and WIStatusServer from the Registry
Certain registry keys can sometimes interfere with the installation of updates and cause errors like the 0x800F081F to pop up. You can easily fix it by deleting the following registries from the system. However, you should first take a backup of these. Once you have taken a backup of these registries, follow the steps below carefully –
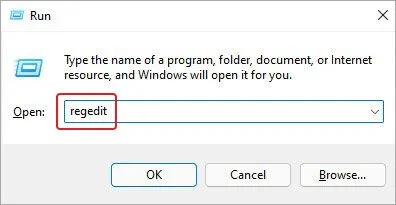
- Press WINDOWS + R and type regedit. Press Enter.
- In the address bar, paste the following address and press Enter – HKEY_LOCAL_MACHINE\SOFTWARE\Policies\Microsoft\Windows\WindowsUpdate
- Locate WUServer & WIStatusServer. Right-click on them and delete them.
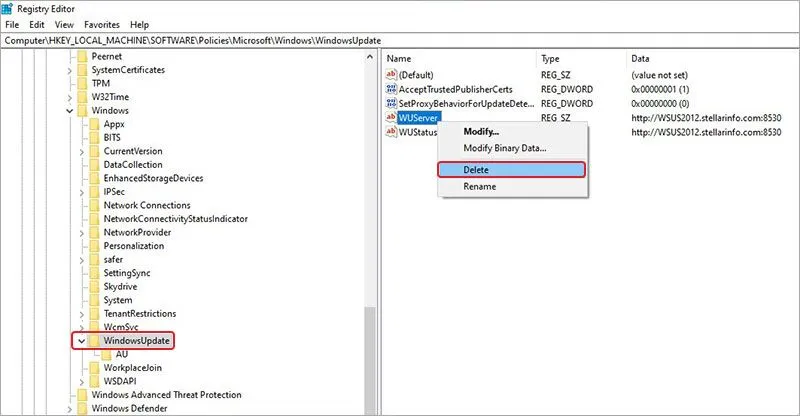
- Restart your computer.
Method 6: Reinstall Microsoft .NET Framework 3.5
The install error 0x800F081F is due to an issue with the Microsoft .NET Framework 3.5. In this case, you can reinstall Microsoft .NET Framework 3.5 to fix the issue at hand. To do so –
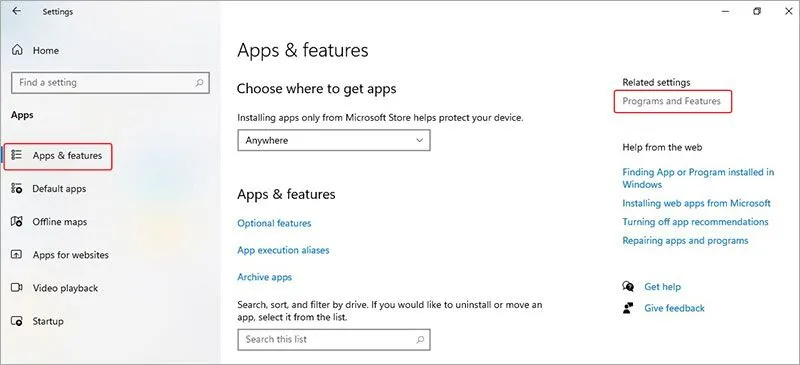
- Press WINDOWS + I to open Windows Settings.
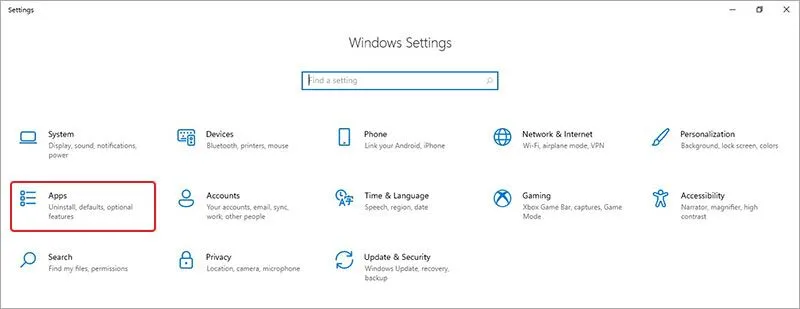
- Click on Apps and then Apps & features in the left pane.
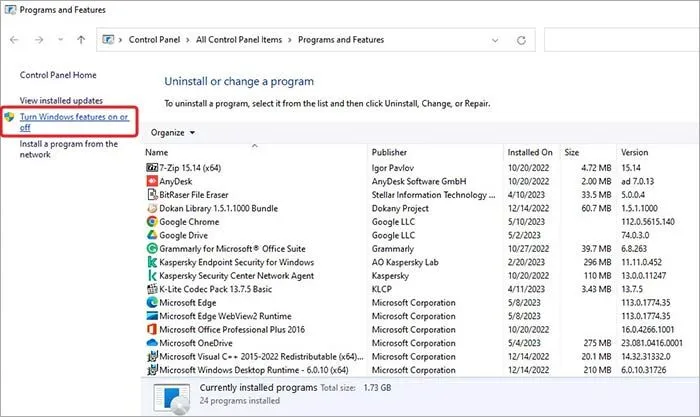
- Locate Related settings and click on Programs and Features under it.
- In the next window, click on Turn Windows features on or off.
- Select the .NET Framework 3.5 (includes .NET 2.0 and 3.0) and click OK.
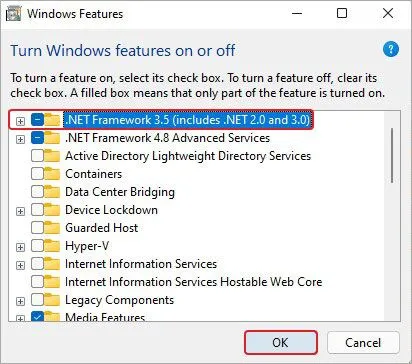
- Wait for the installation to finish.
Method 7: Manually Install Windows 11 Update
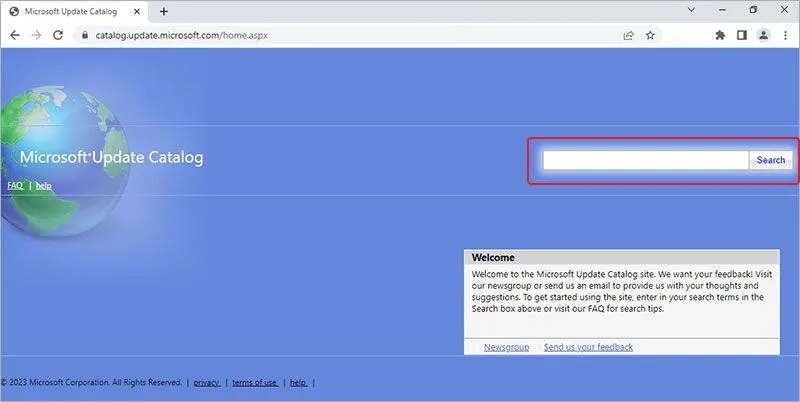
If you are unable to install Windows 11 update that is available in the updates, you can manually download it from the Microsoft Catalogue website and install it. Here are the steps to do this –
- Open the Microsoft Catalogue website.
- In the search bar, type in the KB number and press Search.
- Locate the correct update from the available list of update packages. Click on it.
- Click on Download.
- A download link will appear. Right-click on it and click on Save link as…
- Choose the location where you want to save it and click on Save.
- Once downloaded, go to the save location, and double-click on it to run.
- Follow the instructions as prompted by the installer.
Method 8: Reset Windows 11 without Losing Data
Resetting Windows 11 is the last resort you should employ if none of the above-mentioned methods work. However, you should take a complete backup of your data before proceeding with it. Carefully follow the steps below to reset your PC without losing data –
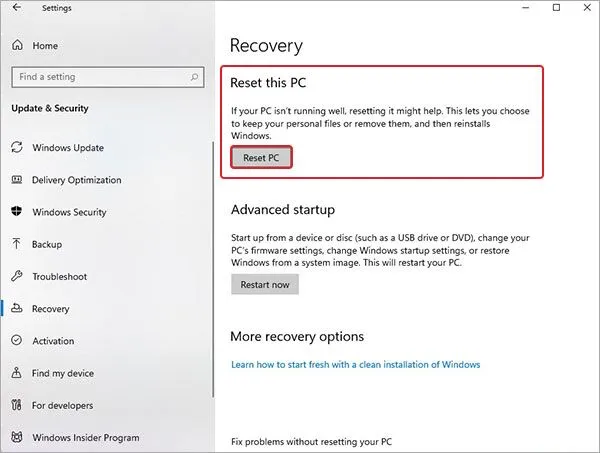
- Press WIN + I to open the Settings app.
- Click on Update & Security.

- Click Recovery in the left pane and then click on Reset PC under Reset this PC.
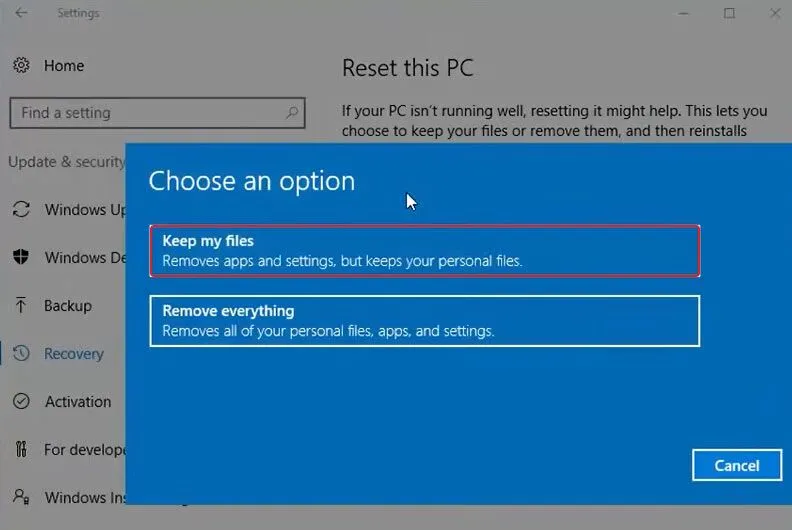
- A prompt will ask you to either Keep my files or Remove everything. Click on Keep my files and proceed further.
- In the next section, you will have to choose between Cloud download or Local reinstall. Carefully, select whatever you feel comfortable with.
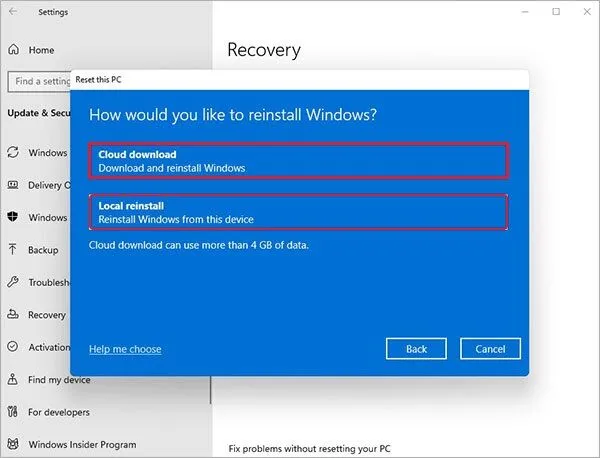
Note – Selecting cloud download will download a fresh image of Windows OS and remove any custom OS image that came preinstalled with the PC.
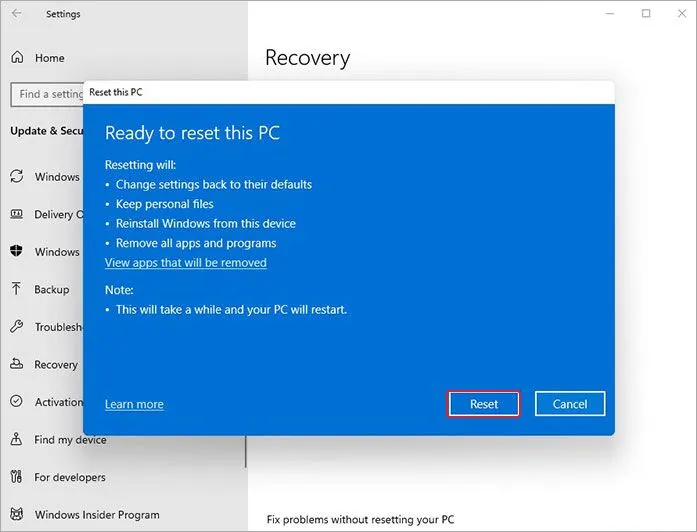
- Proceed with the wizard by carefully reading the reinstallation instructions listed on the Ready to reset this PC screen. Click Reset whenever you are ready.
What if This Error Leads to Data Loss?
Improperly working or installed Windows OS updates can cause errors like the 0x800F081F to pop up, which can lead to subsequent issues and even unexpected system crashes. Unexpected system crashes can cause inconvenience and even lead to unprecedented data losses.
If this error has caused your system to crash and become unbootable or lead to data loss, you should not worry as there is a way to retrieve your data.
Get a professional data recovery software like Stellar Data Recovery Professional to recover your lost data. This powerful software can help you recover your lost data from various devices like SD cards, HDDs, SSDs, and more. It supports recovery of various file types and can recover data lost in various cases like formatting, deletion, system crash, malware attack, and more.
Final Words
The Install error 0x800F081F is a system error code that affected many Windows 11 users trying to install a specific cumulative update. In this post, we learnt the reasons behind this error and discussed some methods to get rid of it. In the end, we also came across a software that can help you get your lost data back safely. We hope the methods mentioned in this post helped you resolve the error and install the updates smoothly.