
Get rid of the unwanted old files from your PC using automatic or manual methods.
KEY TAKEAWAYS
- Use Storage Sense in Settings > System > Storage > Storage Sense to automatically declutter your storage by specifying file deletion criteria.
- Use the built-in PC Manager app to quickly find and remove downloaded, large, and duplicate files.
- Use the ForFiles command in Command Prompt to delete files older than specified days.
If you’re running out of storage on your PC, the best thing to do is to find and remove old, unwanted files. Windows 11 offers multiple ways to find those storage-hogging items, and we’ll show you what those ways are and how to use them in this guide.
Using Storage Sense
Storage Sense is a built-in Windows 11 feature that helps automatically clean up old files. You can configure various options in the feature so it only deletes the files using the specified criteria. You can run the feature manually, or you can set it to run automatically at the specified time.
To configure this feature, launch the Settings app by pressing Windows+i. From the left sidebar, select “System.” On the right pane, choose “Storage.”
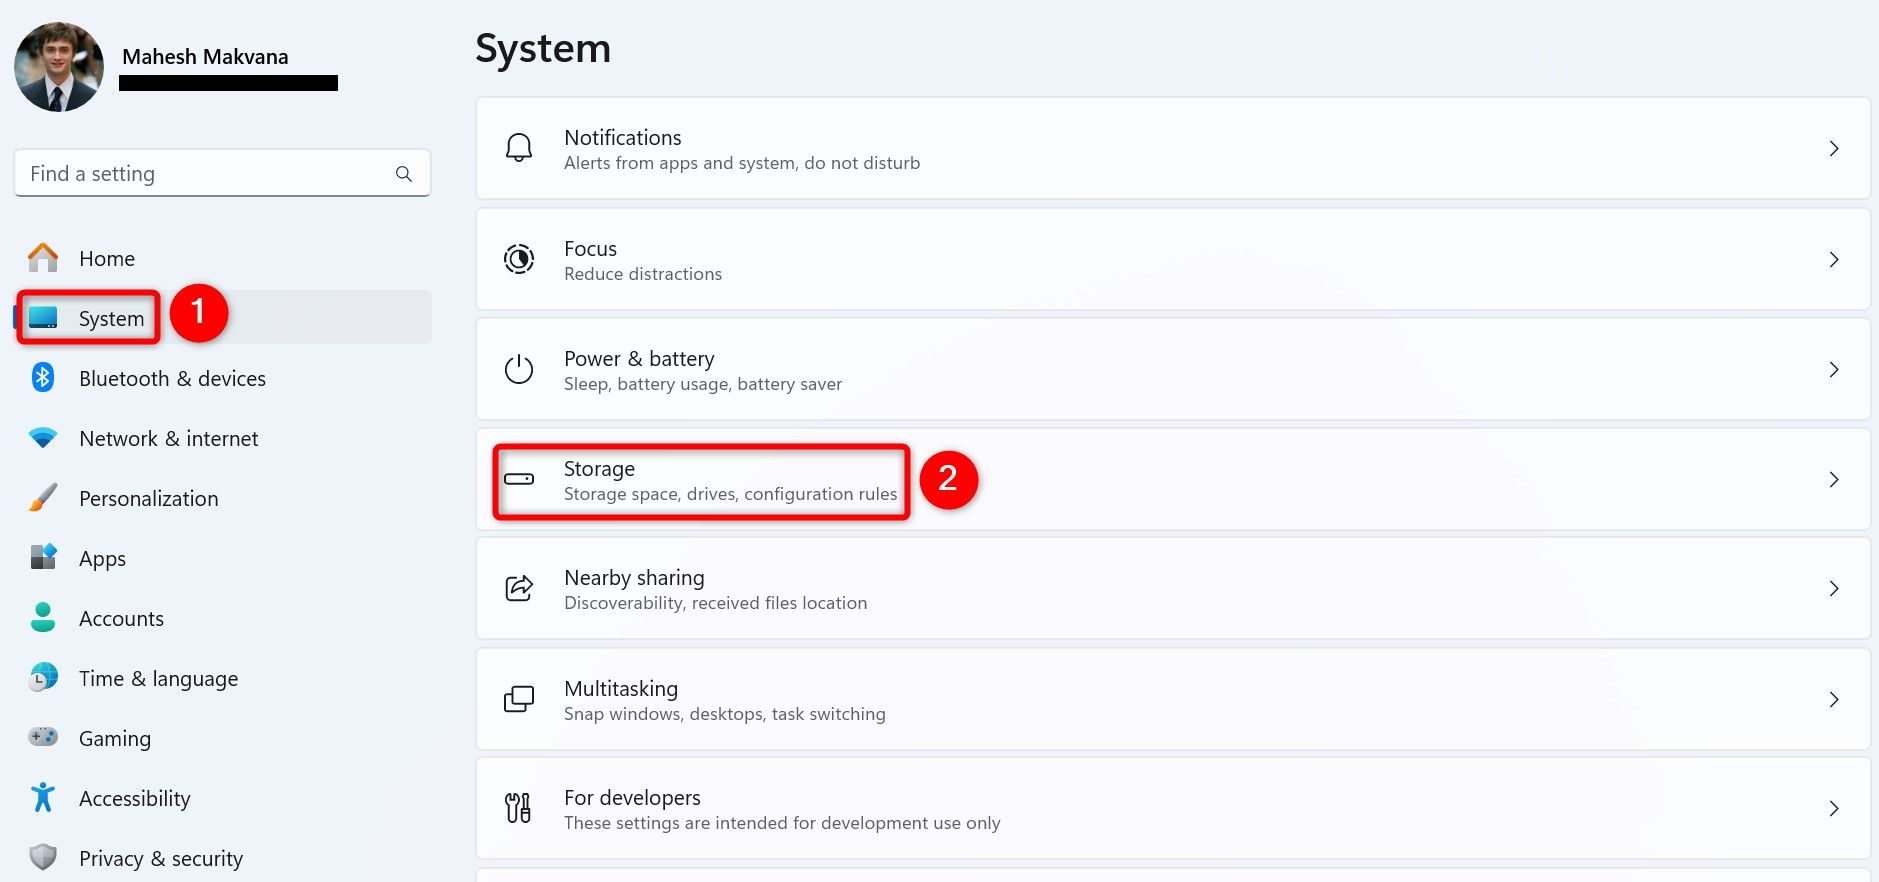
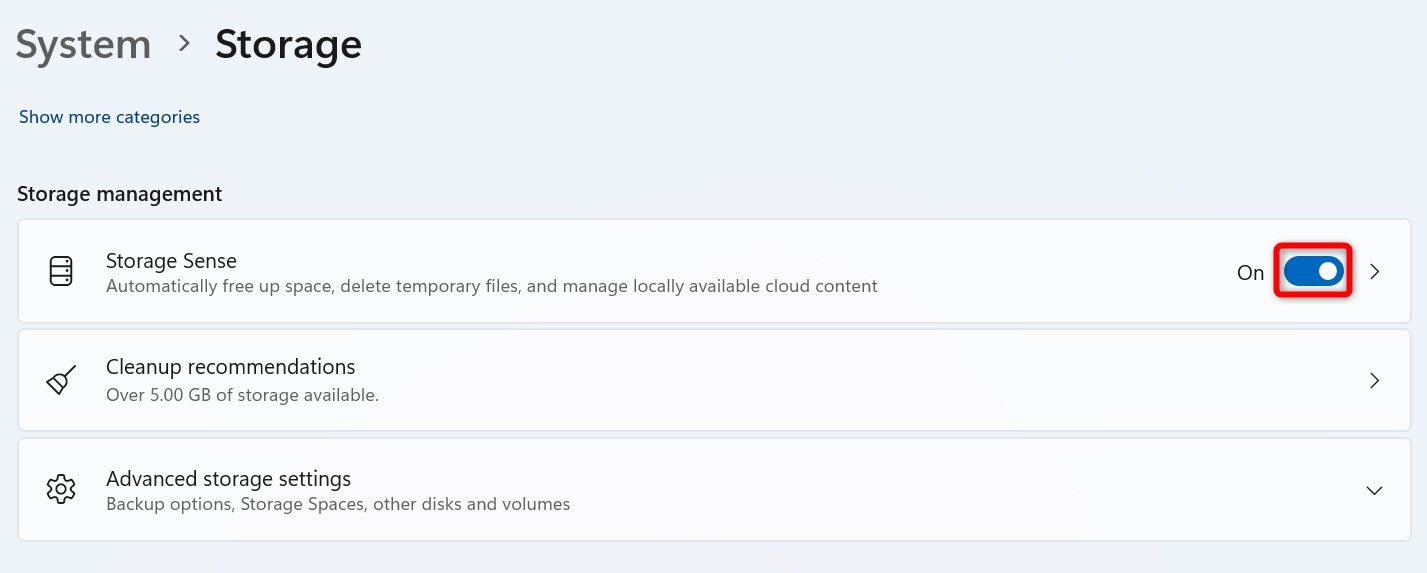
In the Storage Management section, turn on the toggle next to “Storage Sense,” then click “Storage Sense.”
You’ll now configure Storage Sense’s behavior. At the top, enable the option in the “Cleanup of Temporary Files” section so that temporary files are automatically deleted.
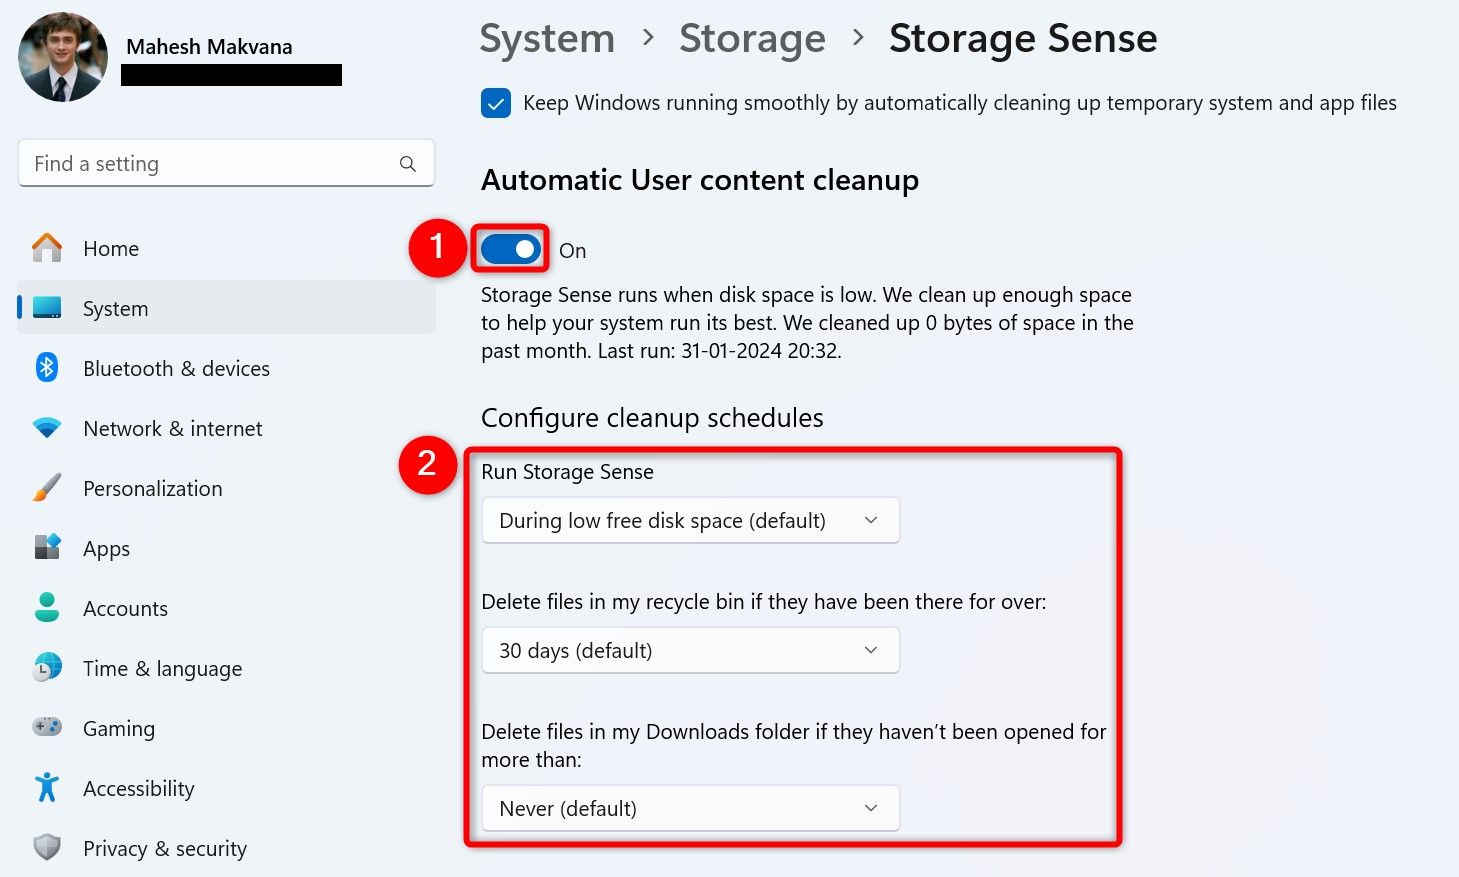
Turn on the “Automatic User Content Cleanup” toggle. Then, configure various options as follows:
- Run Storage Sense: Choose when the feature automatically runs. Your options are Every Day, Every Week, Every Month, and During Low Free Disk Space.
- Delete Files in My Recycle Bin if They Have Been There For Over: Choose Never, 1 Day, 14 Days, 30 Days, or 60 Days.
- Delete Files in My Downloads Folder if They Haven’t Been Opened For More Than: Select Never, 1 Day, 14 Days, 30 Days, or 60 Days.
To run the feature now, click “Run Storage Sense Now.” It will start removing the chosen files.
With Microsoft PC Manager
PC Manager is a built-in Windows 11 app that lets you analyze your storage space and remove downloaded files, large files, and duplicate files. It has a variety of filters that let you quickly find the files you want to let go of.
To use the app, open Windows Search, type PC Manager, and choose the app in the search results. When it opens, from the left sidebar, select “Storage.” On the right pane, in the Files Cleanup section, you’ll see various options.
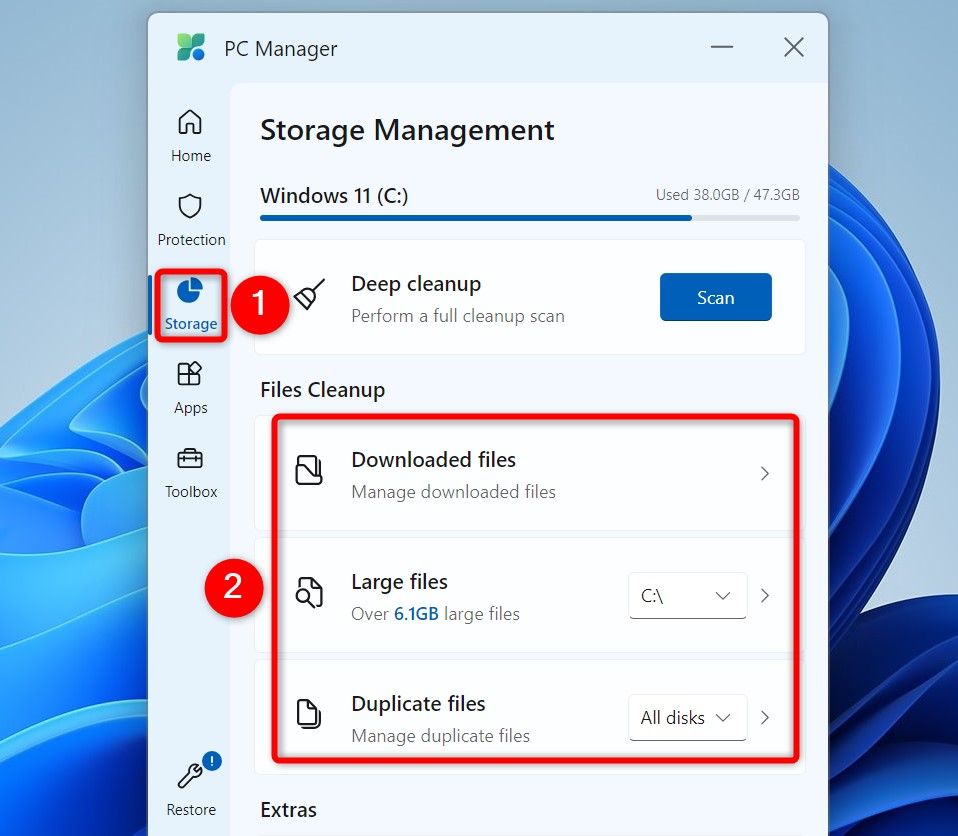
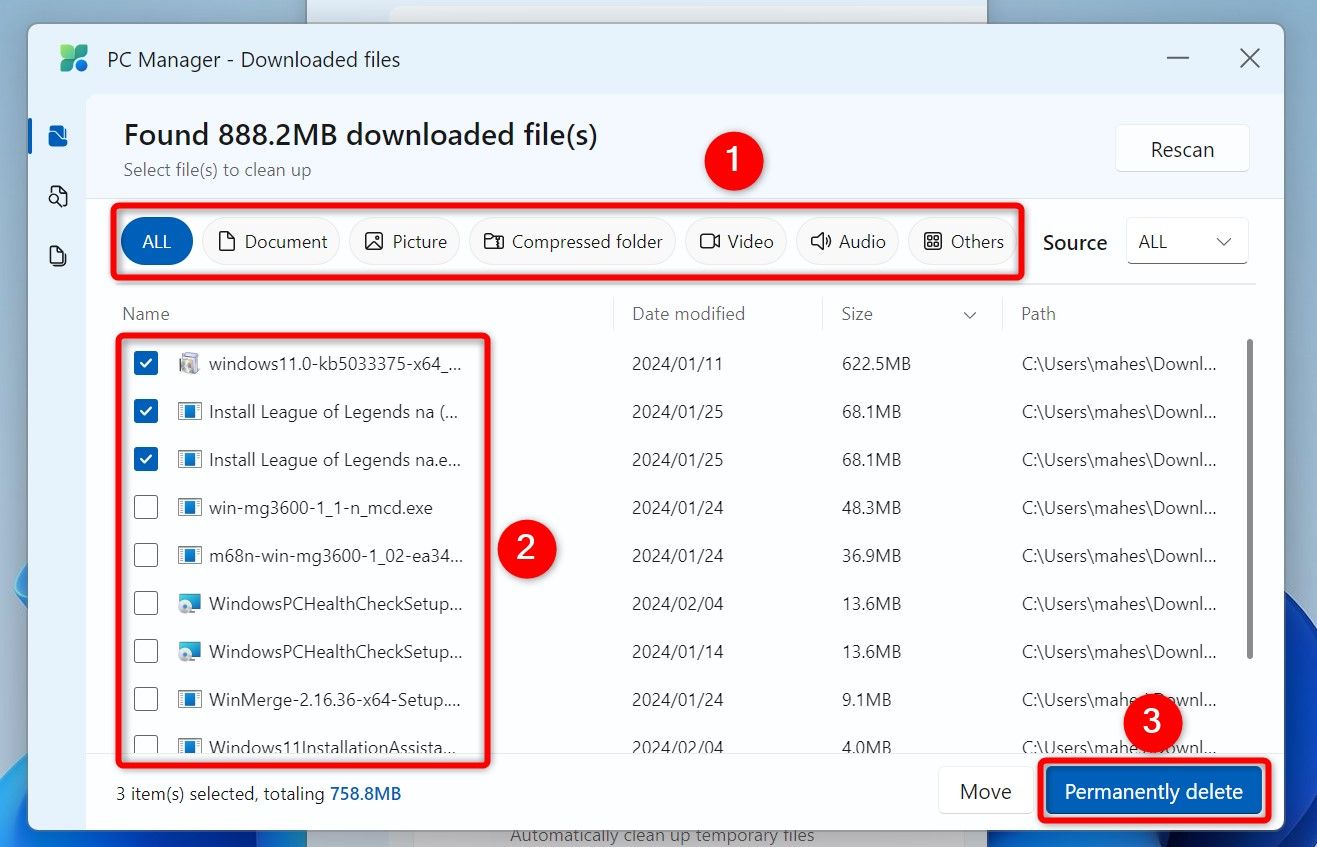
The first option is “Downloaded Files,” which lets you remove the files you’ve downloaded using the installed web browsers. Click it, and it’ll open a window listing your recent file downloads. You can sort these files by their type using the tabs at the top.
Then, select the files you’re happy to let go of. At the bottom, you’ll see the storage space you’ll reclaim after deleting these files. To remove the files, click “Permanently Delete.”
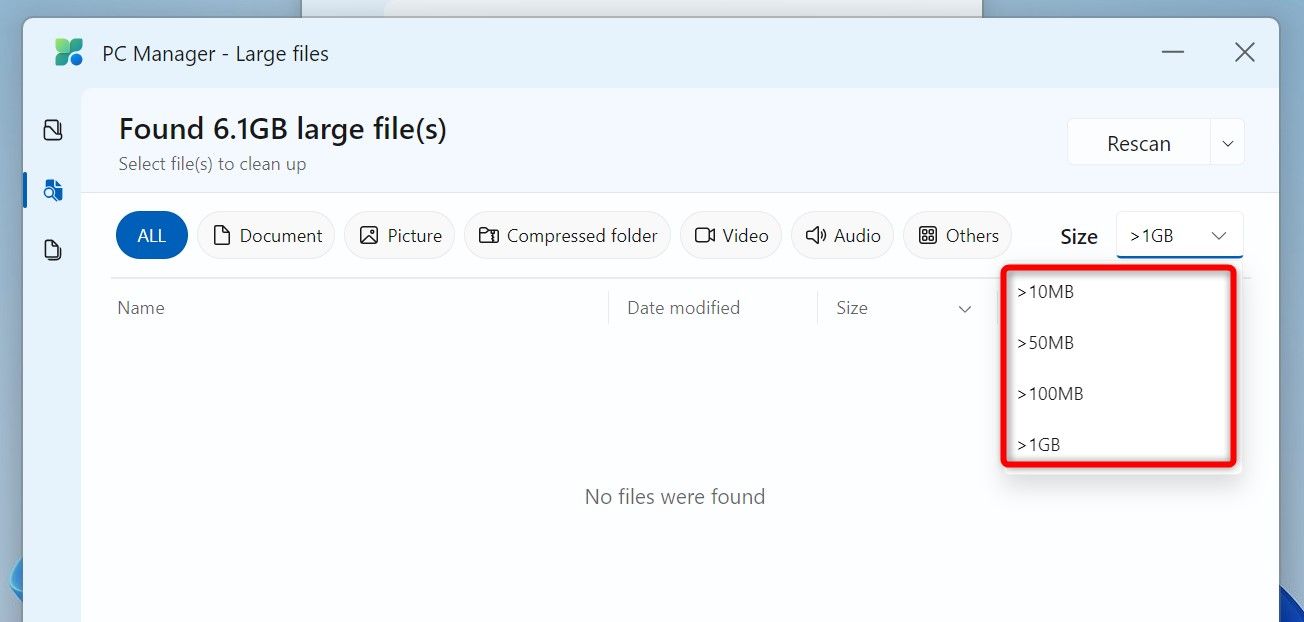
The second option in PC Manager is “Large Files.” As you can guess, it lets you find and remove large files. You can specify the file size here so it only finds files larger than that.
Click the option and use the “Size” drop-down menu to specify your file size.
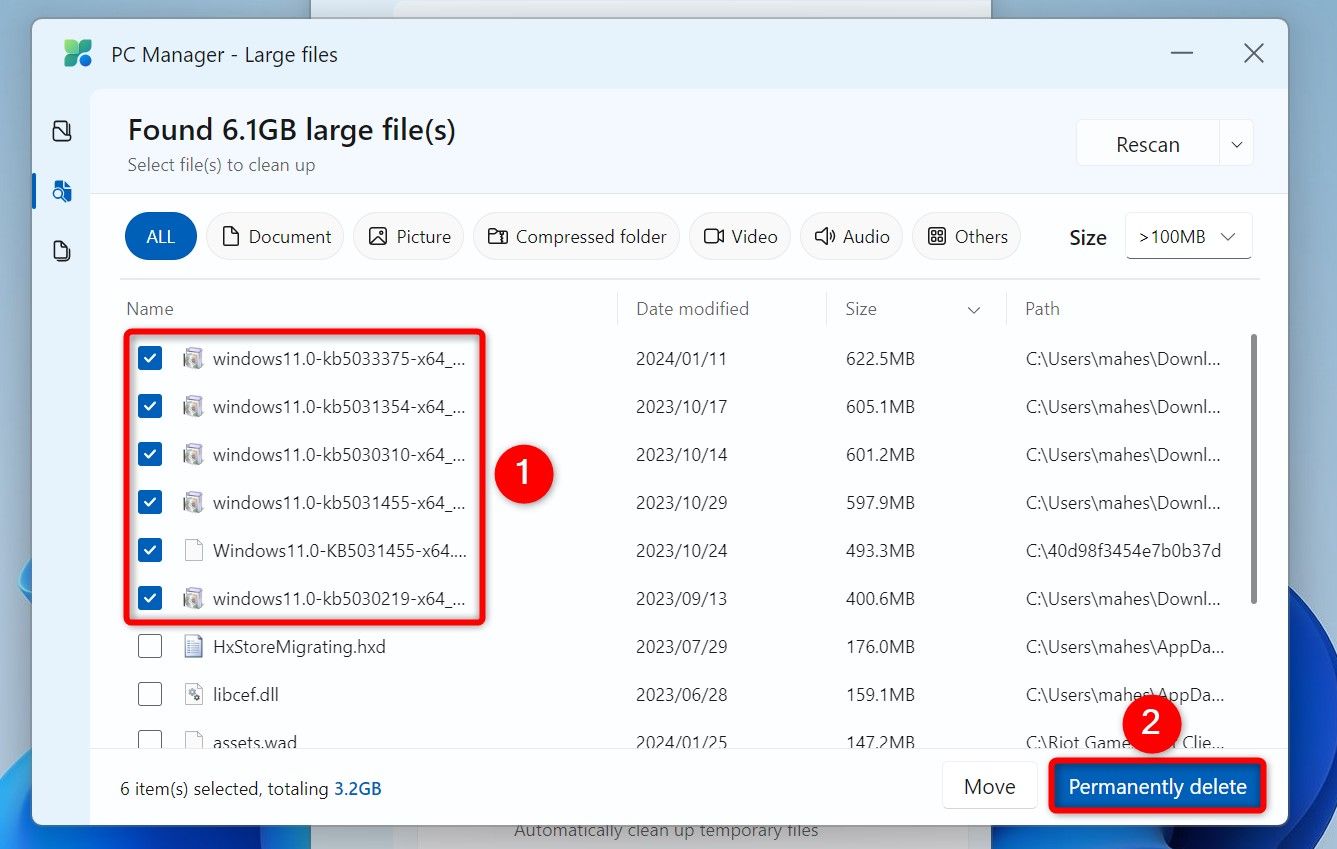
When you see the files listed, choose the ones you want to remove and click “Permanently Delete.”
And that’s it.
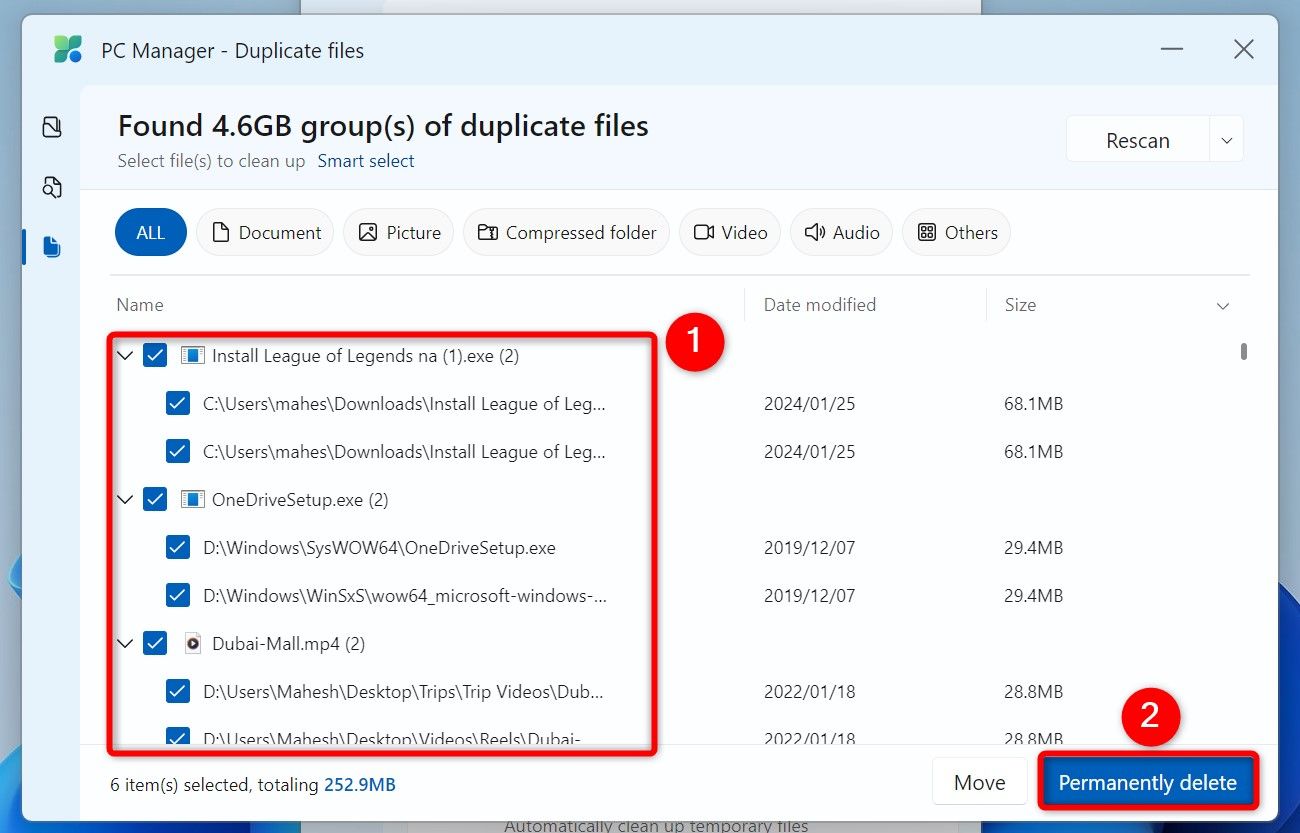
Another useful option is “Duplicate Files.” This option finds the duplicates on your storage and helps you remove them all at once. Use it by clicking the option, letting the feature find any duplicates, choosing the files you want to remove, and clicking “Permanently Delete.”
And you’re all set.
Using Command Prompt
If you prefer Command Prompt, use the ForFiles command to automatically find and delete files older than the specified number of days from select locations. You can run the command each time you want to clean up your storage.
To use it, open Windows Search, search for Command Prompt, and select “Run as Administrator.”
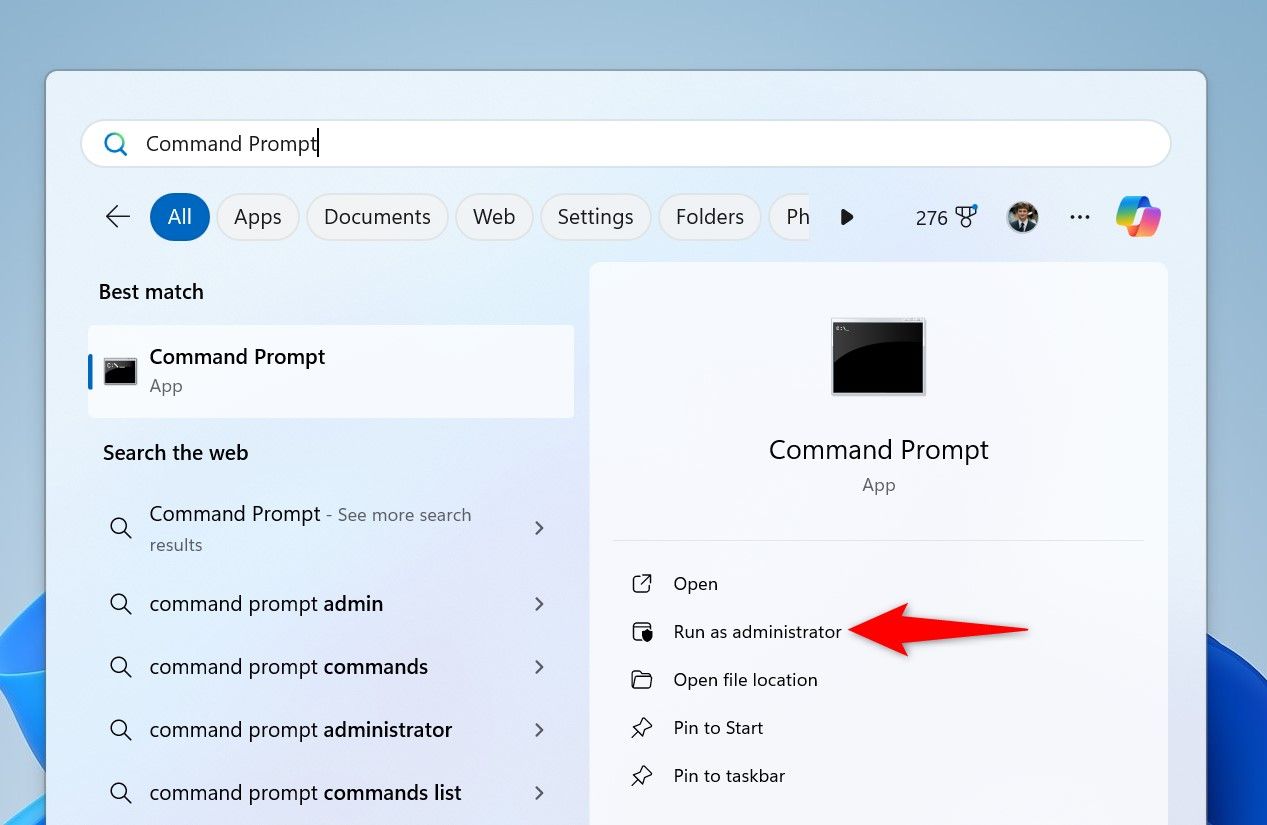
In the User Account Control prompt, choose “Yes.”
In Command Prompt, type the following command. Replace “FolderPath” with the full path to the folder where you want to delete files. Replace “60” with the number of days a file must have existed on your storage for it to be deleted. (Make sure to keep the – (minus sign) before the day number.)
ForFiles /p "FolderPath" /s /d -60 /c "cmd /c del /q @file"Here’s what each parameter does in this command:
- ForFiles: This is the command that retrieves files using the specified criteria.
- p: This parameter tells the command to search files in the given directory.
- FolderPath: This is the full path to the folder where you want to delete files.
- s: This parameter ensures the files inside the subdirectories of the specified folder are deleted.
- d: This parameter sets the date filter, which is followed by the number of days.
- c: This parameter runs the command given next to it.
Note that Command Prompt will delete your files quietly, meaning it won’t ask for a confirmation. And that’s it.
If you want to use this command multiple times, instead of typing it each time, turn it into a batch script. This way, you simply run a file to execute the command and delete the specified files.
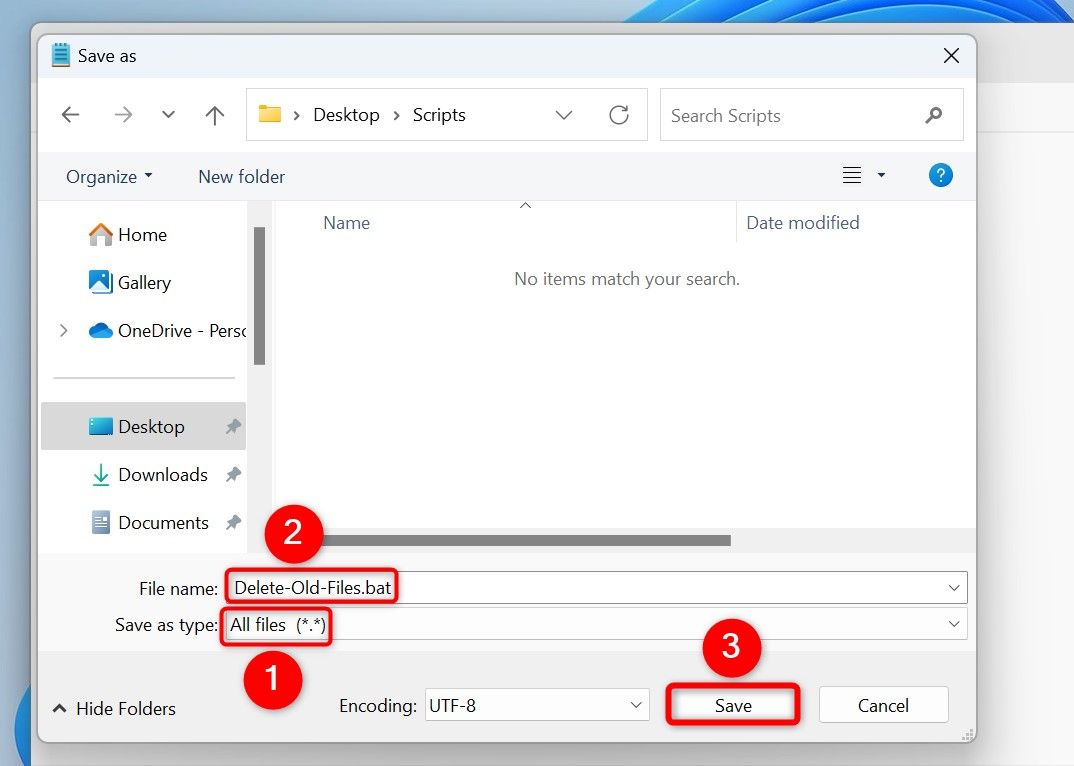
To do that, open Notepad, copy and paste your ForFiles command, and select File > Save As. Click the “Save as Type” drop-down menu and choose “All Files.” Select the “File Name” field, type a name for your script, add .bat at the end of the name, and click “Save.”
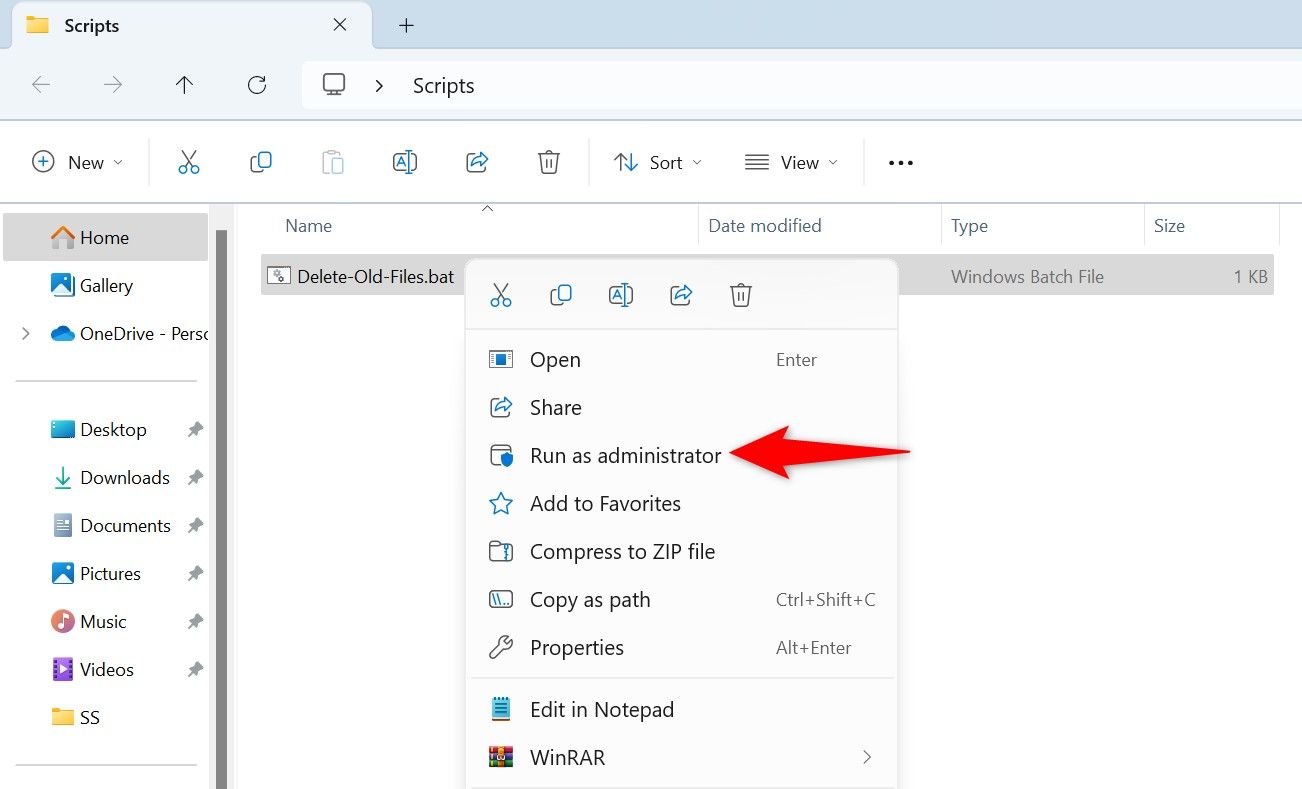
When you want to run your command, right-click your batch script and choose “Run as Administrator.”
You can integrate this batch script with Task Manager, and Task Manager will run the script at your specified time. This basically automates the entire process of finding and removing old files from your specified folders.
And that’s how you get rid of the files sitting on your Windows 11 machine for too long. Enjoy using a decluttered computer!